Using topi Elements
By the end of this page, you'll have a topi Checkout Button rendered on your page.
Rendering your first element
1. Load the library
In the head of your HTML page, load the topi Elements library:
<head>
  <script
    src="https://elements.topi.eu/topi_elements.umd.js"
    type="text/javascript"
  ></script>
</head>
If you are testing topi Elements in Sandbox mode, use the sandbox domain instead: src="https://elements.topi-sandbox.eu/topi_elements.umd.js"
2. Initialize the library
Once the library loads, it adds a global TopiElements object to window. Initialize the library with your config:
const topi = new TopiElements({
  locale: "de",
  widgetId: "your_topi_elements_id",
});
Required parameters:
| Parameter | Possible values | Description |
|---|---|---|
| locale (string) | en, de, nl | Localization of strings rendered in elements |
| widgetId (string) | (Obtain from your topi point of contact) | Unique string scoping the instance to the seller |
If you are using a frontend framework like React, share this topi instance throughout your application, for example with a hook like useContext. How you do that is up to you. You need access to the instance to invoke the setter functions that pass data, such as cart items, into the elements.
3. Decide on a placement
With the library initialized, you can add elements to the page.
Say you want to render a topi Checkout Button on your Cart page. Place the custom element where you want it in your HTML, or in your component tree if you're using a frontend framework:
<body>
  <!-- other elements... -->
  <h3>Total: €899.00</h3>

  <x-topi-checkout-button></x-topi-checkout-button>
</body>
Important: Custom elements like <x-topi-checkout-button> must not use self-closing tag shorthand (e.g. <x-topi-checkout-button />) because HTML parsers treat them differently. This can lead to subtle bugs where the element doesn’t mount or respond as expected. Always use an explicit closing tag: <x-topi-checkout-button></x-topi-checkout-button>.
This won't show anything yet. By default, the topi Checkout Button does not render when the cart is empty.
To make it render, pass in some cart items.
4. Pass in cart contents
The TopiElements instance you initialized earlier has a setter called cartItems. Set the contents every time the shopper's cart changes:
// the single instance from earlier
// remember to reuse the same instance!
const topi = new TopiElements(config);

topi.cartItems = [
  {
    price: {
      currency: "EUR",
      gross: 119000,
      net: 100000,
      taxRate: 1900,
    },
    quantity: 1,
    sellerProductReference: {
      reference: "179321ce-0a89-4b43-a810-7af09a61061d",
      source: "SKU",
    },
  },
  {
    price: {
      currency: "EUR",
      gross: 89900,
      net: 75546,
      taxRate: 1900,
    },
    quantity: 2,
    sellerProductReference: {
      reference: "abc-123-xyz",
      source: "SKU",
    },
  },
];
Setting cartItems triggers an API request to topi from the client with the cart information. When the response arrives, every topi element on the page receives the data and re-renders if needed. In this example, that's the single Checkout Button.
There is an API reference for this. topi Elements uses the same code path internally as the /catalog/carts/rental-overview endpoint. Some properties, like price, are optional, so check the reference.
If the items you passed match products in your topi catalog, the topi Checkout Button now renders on the page.
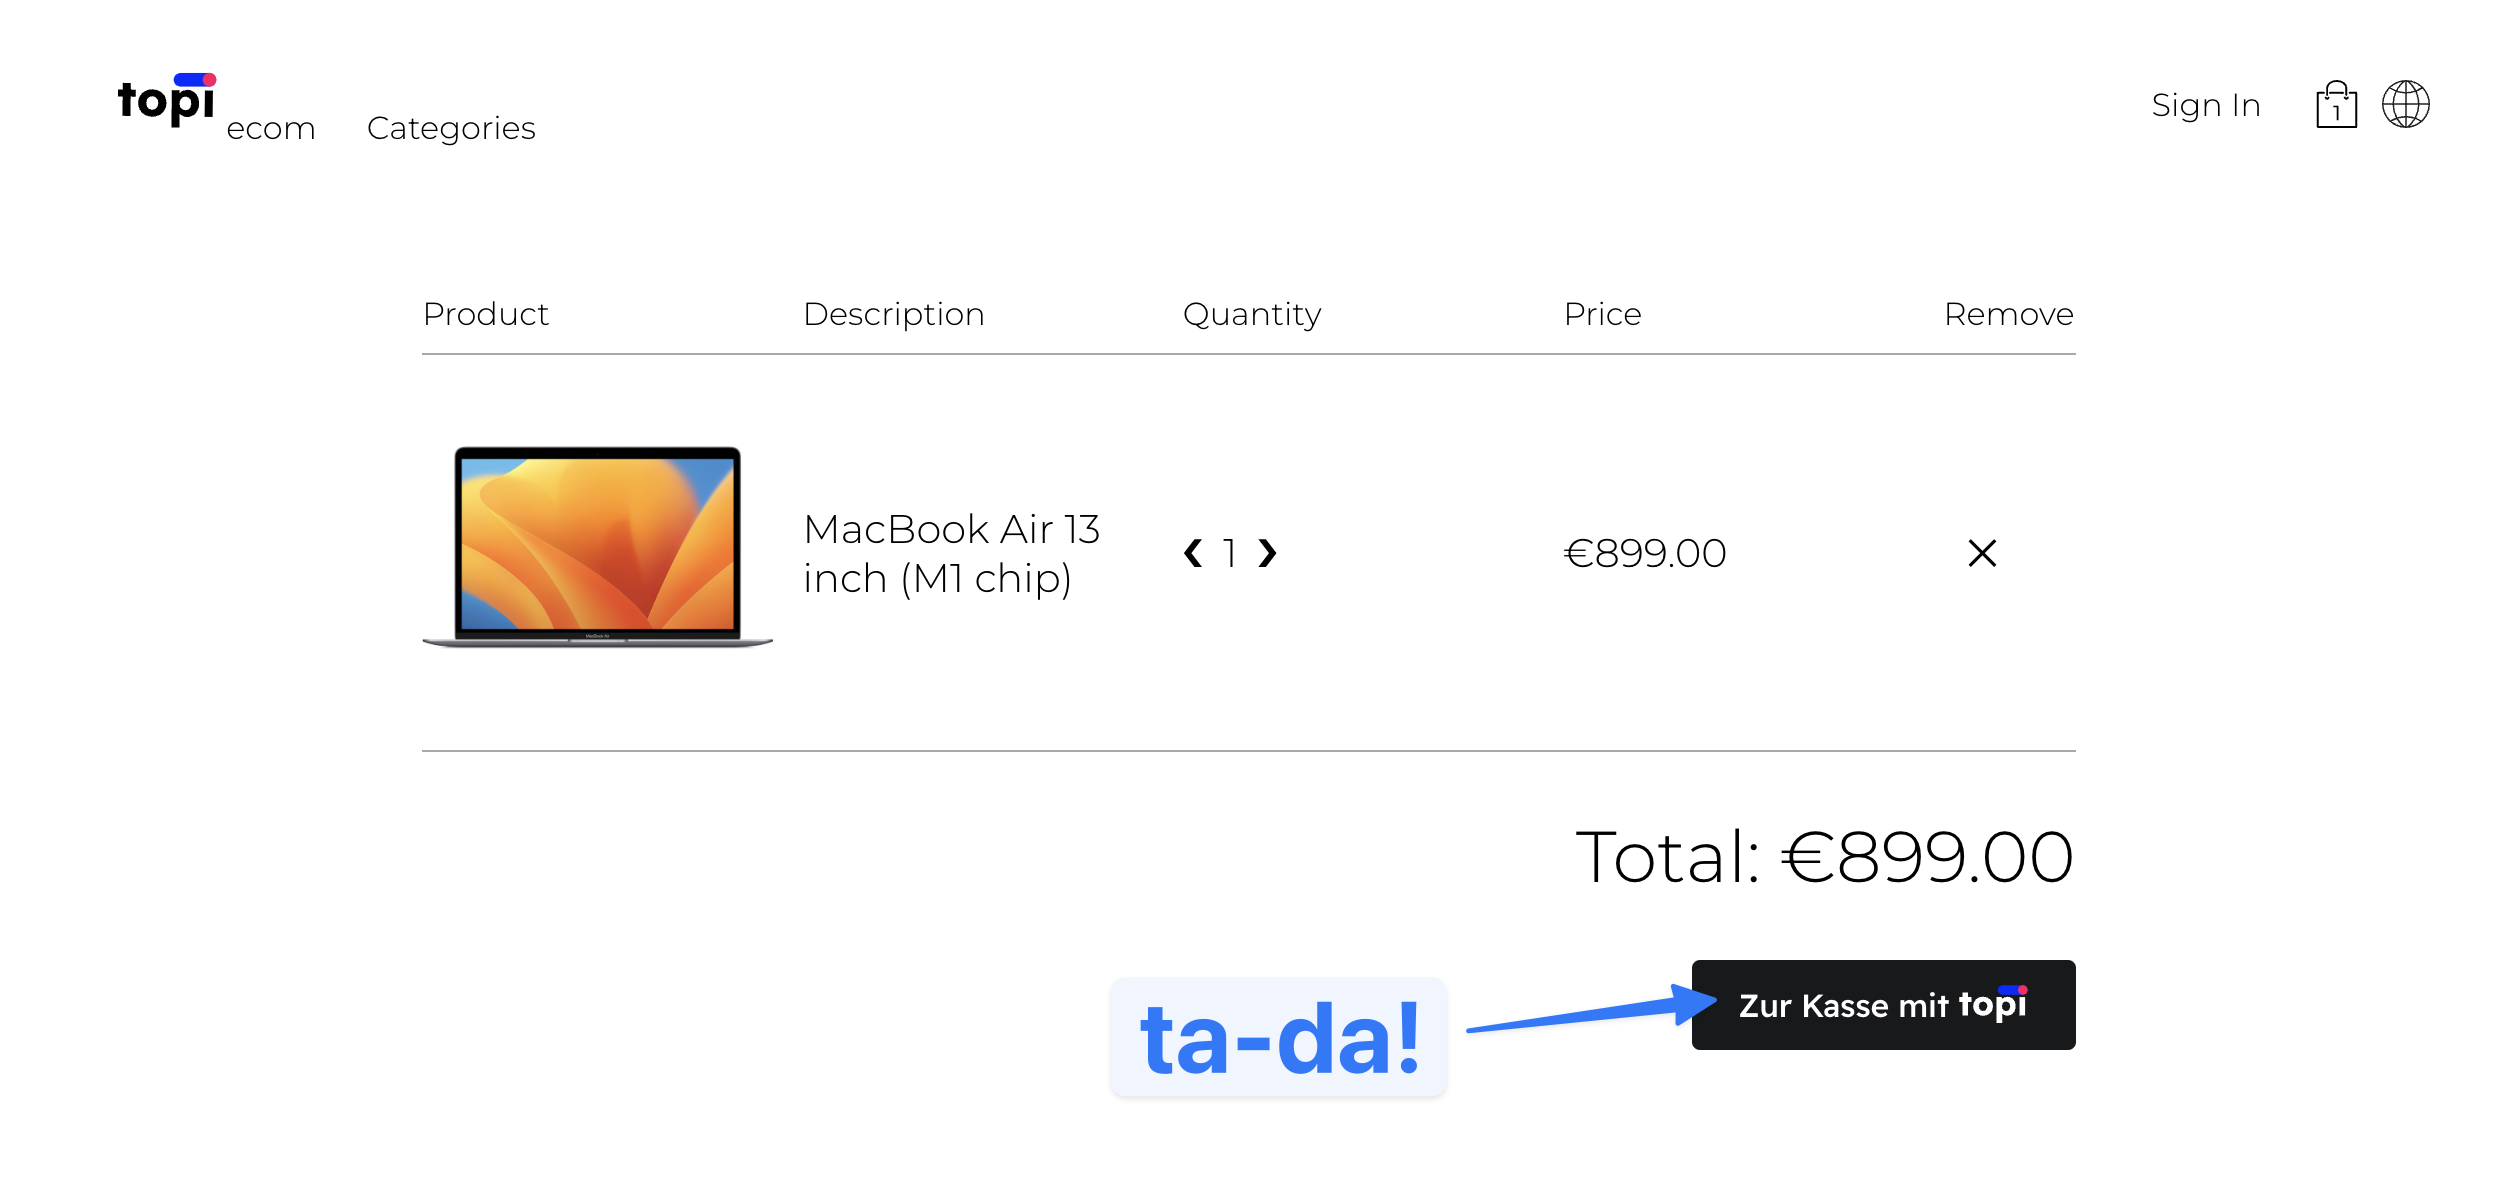
You now have a custom element on your store that renders conditionally based on the cart contents.
Open your browser's Dev Tools and look at the Network tab. You'll see the request made to topi with the data you passed in, and topi's response with the pricing information that is now available across your store's frontend.
This response is shared across all topi elements on your pages, so you don't have to call the setter again each time you add a new element.
Keep updating topi Elements with the cart contents using topi.cartItems = [...]. If you don't, the elements may display incorrect topi pricing.
Next, a look at how data and state work, since there is some complexity worth explaining.
Quick Reference
When to call which setter:
| Page/Context | Setter to use | What to pass |
|---|---|---|
| Cart page | topi.cartItems = [...] | Array of all cart items |
| Payment selection page | topi.cartItems = [...] | Array of all cart items |
| PDP page | topi.pdpItem = {...} | Single product object |
| PLP page (coming soon) | topi.plpItems = [...] | Array of products |
Key rule: Always call the appropriate setter whenever the page/data changes, even if revisiting the same item.
Understanding state in topi Elements
In rendering your first element, the Checkout Button is coupled to the input passed into the topi.cartItems = [...] setter. The Checkout Button relies on your cartItems input to determine its behaviour.
But what about other elements and situations? For example, what if you wanted to render the Checkout Button on the PDP and have it behave according to a single PDP item instead of the whole cart?
This is where it helps to understand state management inside topi Elements.
PDP vs Cart states
State is separated around distinct segments of the ecom flow:
- PDP has its own state, and you set it using
topi.pdpItem = item - Cart has its own state, and you set it using
topi.cartItems = [item, item] - (coming soon) PLP has its own state, and you set it using
topi.plpItems = [item, item]
This separation makes the relationships between the custom elements and the state inside topi Elements clear.
Returning to the Checkout Button on the PDP page, you need to do two things to make it work. First, tell topi Elements about the PDP item being viewed:
topi.pdpItem = {
  // ...
};
This sets the PDP state in topi Elements. All elements that rely on the PDP state receive the update and render or re-render if needed.
To make sure topi displays the correct rental price for the item being viewed, call the setter on every page render. If the shopper is revisiting the same item, topi Elements does not re-render the element.
A Checkout Button relies on the Cart state by default. The second step is to mark this instance of the element to use the PDP state instead. In HTML:
<x-topi-checkout-button checkout-mode="product"></x-topi-checkout-button>
To summarize:
- State is managed separately for PDP, Cart, and PLP
- Elements can be told which state to use, where applicable
- This separation makes it easier to reason about how elements behave relative to state
Now that you know how to render an element and how to think about the state it relies on, you can use the full set of topi Elements.
Choose your next step:
Common Mistakes
❌ Mistake 1: Using <x-topi-checkout-button /> (self-closing)
✅ Fix: Always use <x-topi-checkout-button></x-topi-checkout-button>
❌ Mistake 2: Forgetting checkout-mode attribute
✅ Fix: Always specify checkout-mode="cart" or checkout-mode="product"
❌ Mistake 3: Not updating cartItems when cart changes
✅ Fix: Call topi.cartItems = [...] every time the cart updates
❌ Mistake 4: Passing only one item to cartItems on a multi-item cart
✅ Fix: Pass ALL items in the cart, not just one
❌ Mistake 5: Using cartItems on PDP instead of pdpItem
✅ Fix: Use topi.pdpItem = {...} for PDP, topi.cartItems = [...] for Cart